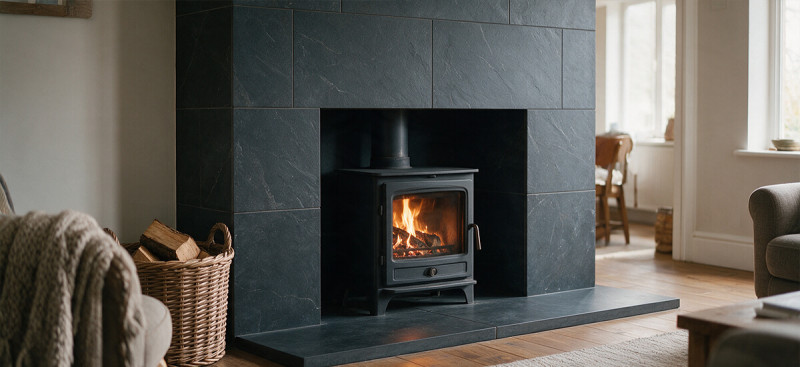

A tiled fireplace can change a whole room. It's also one of the DIY jobs people most often get wrong, because a fireplace isn't just another wall. It gets hot. It sits on a hearth that has to meet building regulations. And if there's a stove involved, the materials around the fire opening deal with conditions a bathroom wall never sees.
So before you settle on a colour, you need to know two things: which parts of the fireplace you can tile, and which tiles are up to the job.
This guide covers both. We'll go through the best tiles for a fireplace, what to put on the hearth, where tiles shouldn't go at all, and then a full step-by-step on how to tile a fireplace yourself, from fixing cement board to the last bead of silicone. The installation section draws on a DIYer's own chimney breast and stove project, mistakes included, so you can learn from them without repeating them.
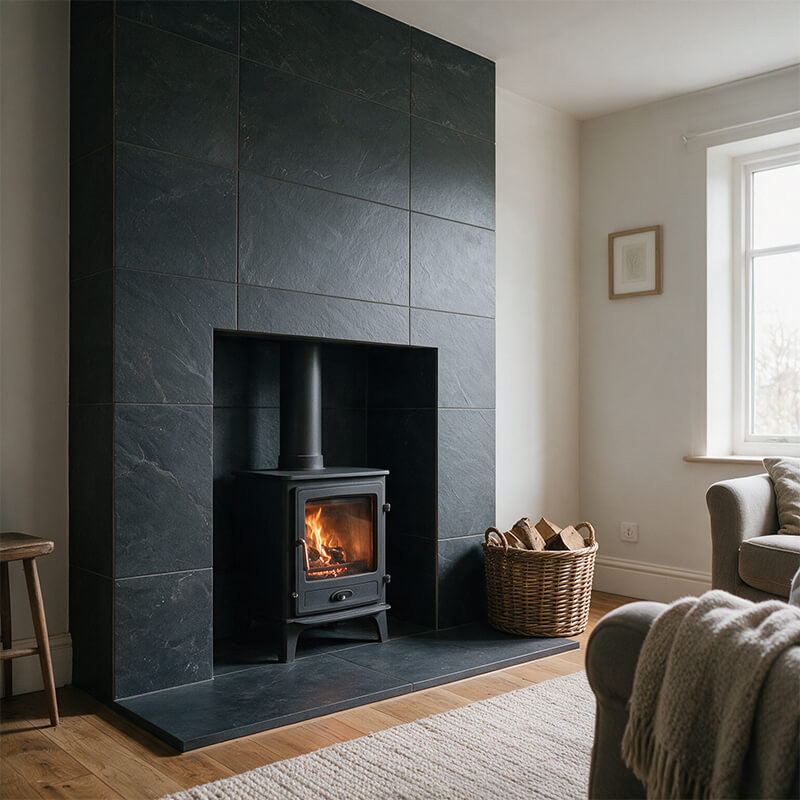
First, know which parts of your fireplace you can tile
A fireplace has three zones, and each one has different rules.
The chimney breast and surround. These are the walls above and either side of the fire. This is where most of the tiling happens, and where porcelain, stone effect cladding and brick slips all work well.
The hearth. This is the non-combustible base in front of and under the fire or stove. You can tile it, but the tiles are a finish on top of a properly built constructional hearth. They don't replace it.
The firebox and the area directly behind a stove. This is the inside of the fire opening and the back panel immediately behind the stove body. It sees the highest temperatures, and it needs specialist fire-rated materials such as firebricks or fire-rated boards, as specified by the stove manufacturer and your installer. Decorative wall and floor tiles aren't designed for this zone.
If your stove sits inside a widened opening with tiled reveals (the side walls of the opening), the right materials depend on your stove's clearances. Ask your installer before you tile anything inside the opening.
The best tiles for a fireplace
For the surround and chimney breast, you want a dense, low-porosity tile that copes with repeated warming and cooling without crazing, discolouring or working loose. Here's how the main options compare.
| Tile type | Best for | Watch out for |
|---|---|---|
| Porcelain | Clean, modern or stone-look surrounds; hearths | Heavy in large formats; harder to cut than ceramic |
| Stone effect tile cladding | Rustic, textured chimney breasts | Textured faces need careful cutting and edge detailing |
| Thin stone cladding and natural stone | Authentic stone character | Porous; usually needs sealing; heavier |
| Brick slips | Exposed-brick look without building masonry | Porous faces mark more easily near the opening |
Porcelain fireplace tiles
For most fireplaces, porcelain is where we'd start. Porcelain tiles are fired at very high temperatures and have water absorption of 0.5% or less (group BIa under ISO 13006), which makes them dense, hard-wearing and stable. That density is why they're a common choice for surrounds and hearths: they don't soak up soot or moisture, and a damp cloth deals with most marks.
Glazed porcelain tiles for a fireplace give you the widest choice of looks. The design is printed into the glaze, so you can get slate, marble, concrete or limestone effects without the maintenance of real stone. Through-body porcelain carries its colour through the whole tile, which hides chips better on a hearth edge.
Why we suggest dark colours. A fireplace is the one wall in the house that gets smoke, soot and heat. Charcoal, anthracite, graphite and dark slate-effect porcelain tiles hide the light staining that builds up above a fire opening over time. A dark surround also frames the fire, so the flame or stove becomes the focal point rather than the tiles. Pale tiles can work, but expect to clean them more often, especially above the opening.
Matte or textured finishes are more forgiving than gloss. They show fewer fingerprints and soot marks, and they don't reflect firelight as glare.
Format. On a chimney breast, 30x60cm and 60x60cm formats are a good balance for DIY. They're large enough to keep grout lines down, but still manageable to cut around a lintel. Larger formats (60x120cm and up) give a cleaner look but are heavy, harder to handle on a vertical wall and less forgiving of an uneven background.
Stone effect tiles for a fireplace
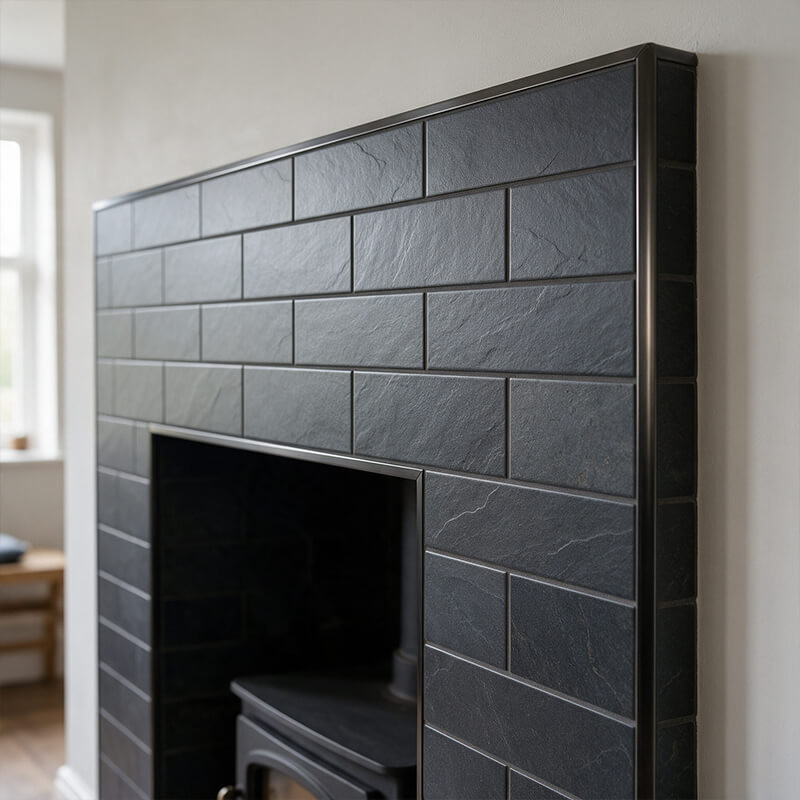
If you want the texture of a stone chimney breast without the weight of real stone, stone effect tile cladding is worth a look. These are tiles with a split-face or stacked-stone surface, so you get the depth and shadow of a ledgestone wall with the consistency of a manufactured product.
Two practical points. Textured faces make cutting slower, so a wet tile cutter with a good diamond blade is close to essential. And outer corners need planning: decide early whether you'll use a trim, mitre the edges, or let one face overlap the other.
Thin stone cladding and natural stone tiles
For real stone, thin stone cladding gives you natural variation in every piece. No two fireplaces end up the same. Natural stone tiles such as slate, limestone or travertine suit a flatter, more traditional surround.
Natural stone is more porous than porcelain, so most types need sealing before and after grouting. That matters near a fire, where unsealed stone can pick up soot. Stone is also heavier, so check your background can take the load, and use an adhesive the manufacturer approves for your stone. Light marbles and limestones generally need a white adhesive to avoid shadowing through.
Brick slips for a fireplace
Brick slips (also called thin brick tiles) are thin brick faces that you fix to the wall like tiles. You get the look of an exposed-brick chimney breast without building a new skin of masonry or knocking back plaster to find the original brick, which is often in poor condition anyway.
They suit everything from cottage-style living rooms to industrial open-plan spaces. Because brick is porous, a sealer helps resist soot marks around the opening.
We've covered this option in much more detail in Transform Your Fireplace with Brick Slips, or you can browse our brick slips range.
Not sure which look suits your room? Order free samples and hold them up against your chimney breast in daylight and in the evening with the lights on. A tile that looks warm in a showroom can read very differently next to your own walls and flooring.

What tile to use on the hearth of a fireplace
The hearth takes more punishment than the surround. It gets foot traffic, dropped logs, hot ash and the heat from the base of a stove. Choose a porcelain floor tile (not a wall-only tile) for the hearth, ideally in a matte or textured finish so it isn't slippery and doesn't show every speck of ash.
A few things to keep in mind:
- The tiles go on top of the constructional hearth. They don't change its required size or thickness, which is set by the building regulations and your stove's instructions.
- Fewer joints are better. A large-format porcelain tile cut to the hearth size means fewer grout lines to keep clean.
- Finish the exposed front edge with a tile trim, or a neatly polished cut edge, so it doesn't chip when it gets knocked.
- Dark hearth tiles hide ash and scorch marks far better than light ones.
Heat resistant tiles behind a stove: what you need to know
"Heat resistant tiles" and "heat proof tiles for a fireplace" are some of the most common searches on this topic, and the honest answer is that the tile is rarely the weak point. Porcelain is a fired ceramic and handles a warm surround well. What fails is usually the system around it: the wrong adhesive, a background that moves, grout where there should be a movement joint, or a tile fixed somewhere it should never have gone.
That's why the area directly behind a stove and inside the firebox needs specialist fire-rated materials rather than decorative tiles. Your stove manual will specify what's needed there and the minimum distances to anything combustible. Follow it, and if in doubt, ask your installer.
For the chimney breast and surround, porcelain, stone effect cladding, natural stone and brick slips are all suitable when fixed with the right adhesive to a sound, non-combustible background.
Fireplace tiling and building regulations in Ireland
In Ireland, fireplaces and stoves fall under Part J of the Building Regulations, with guidance set out in Technical Guidance Document J (Heat Producing Appliances). It covers things like hearth construction and size, how close an appliance can sit to walls and combustible materials, and flues.
Tiling the surround is a cosmetic job, but it can still affect compliance. Don't reduce the size of the hearth, block any air vents, or leave timber battens or other combustible material within the clearance zone of the fire. If you're fitting a new stove or altering the opening, have the work checked or carried out by a registered installer, and confirm your tiling plans with them before you start.
Installation guide: how to tile a fireplace step by step
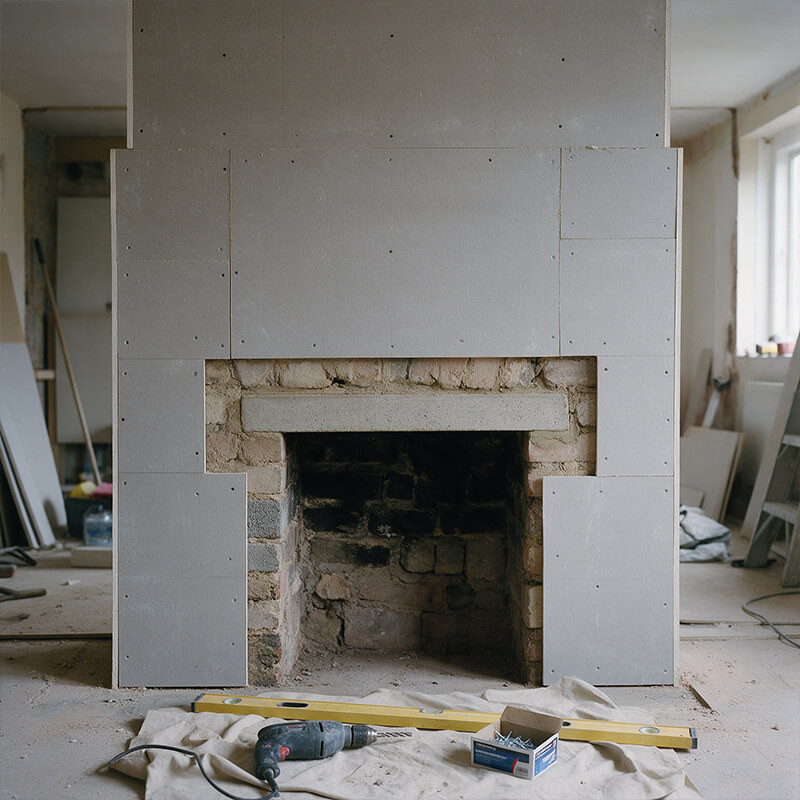
This is the part where most of the time goes. The tips below come largely from a DIYer who tiled her own chimney breast and stove opening with large textured porcelain tiles, and who was honest about what went wrong along the way.
Tools and materials you'll need
- Cement board and suitable fixings (concrete screws into masonry)
- A primer recommended by your adhesive manufacturer
- Flexible tile adhesive for the surround, such as Botament M20 Speed Rapid Flexible Adhesive C2 FT (see all tile adhesives)
- A specialist heat-resistant fireplace adhesive for any area inside the opening your installer has approved for tiling
- A 10mm notched trowel for larger tiles
- A spirit level, and ideally a laser level
- Straight timber battens and packers
- Tile levelling clips and wedges, plus 2mm spacers
- A wet tile cutter with a good-quality diamond blade
- Tile trims for outer corners and edges, a hacksaw and a mitre box
- Flexible grout, a grout float and sponges
- Colour-matched silicone for movement joints
- A mixing paddle, buckets and plenty of clean water
About the adhesive. Botament M20 Speed is a flexible, rapid-setting C2 FT adhesive. Its data sheet lists it for porcelain stoneware and natural stones that aren't sensitive to discolouration, and for heated areas. It's ready for grouting after roughly 100 minutes and fully loadable after about 24 hours, with an open time of around 20 minutes. With a 10mm notched trowel, expect to use roughly 3.8kg per m². Always check the data sheet against your own background and conditions.
Step 1: Get a flat, solid background
Old fireplaces are rarely flat. Take off any old tiles or brick facing, then check the wall with a long straight edge. A mix of old brick and block, or a wall full of dips, is best covered with cement board. It gives you a flat, stable, non-combustible surface to tile onto.
Bed the board in adhesive and screw it to the wall. Watch the screws as you go: on an uneven wall they can pull the board into a dip. Concrete screws give you better control. Check the board with your straight edge before moving on.
Step 2: Prime the board
Cement board is absorbent and will pull water out of your adhesive too quickly if you don't prime it. Apply the primer your adhesive manufacturer recommends and let it dry fully before tiling. Doing this the night before saves time.
Step 3: Make the outer corners plumb
Where you're tiling up to an outer corner, screw a straight timber batten to the corner and set it perfectly plumb with a spirit level, packing behind it where there are dips. This gives you a true edge to work to and keeps your columns straight all the way up. Leave it on until that side is tiled.
Step 4: Plan your layout before you mix anything
This is the step that makes or breaks the finished look. Lay tiles out on the floor, or mark a straight piece of timber with tile widths plus grout joints (a "story pole"), and hold it against the wall to see where the cuts will fall.
Centre the layout on the chimney breast so the cuts on each side match. Then test different starting points. In the project we followed, starting from the hearth left a thin sliver at the top. Starting from the floor meant awkward L-shaped cuts around the lintel. Starting from the underside of the lintel gave fuller tiles at both the top and bottom, and avoided the L-cuts entirely.
A stacked layout (tiles lined up in a grid) needs careful planning but is forgiving at the ends. A running bond (brick pattern) needs even more planning to avoid thin cuts at the edges.
Step 5: Order more tiles than you think
The standard advice is to add 10% for waste. On this project, a centred, stacked layout on a chimney breast with narrow returns meant most offcuts couldn't be reused, and 10% fell well short. The DIYer estimated she needed closer to 16–18% extra, and had to wait for a second delivery before she could finish.
On a chimney breast with lots of cuts, allow 15–20% and buy it all at once so the tiles come from the same batch.
Step 6: Fix a level batten for your first row
Use a laser level to mark the line for your first full row, double-check it with a spirit level, and screw a straight batten to the wall along it. Your first row of tiles sits on this batten, so take your time getting it right. Everything above it follows this line.
Pre-drill the batten, and if it's carrying weight without much fixing, a simple prop underneath gives you peace of mind.
Step 7: Cut porcelain with a wet cutter
Textured porcelain is hard on manual cutters. In this project a manual cutter handled one clean cut, but narrow strips taken off the edge of a tile cracked repeatedly. Switching to a wet tile cutter with a diamond blade solved it.
The blade matters too. A cheap replacement blade started chipping the edges quickly, while a better-quality blade made for porcelain cut cleanly. When you mark a cut, put any chipped or rough edge on the offcut side, and use a tile file to tidy cut edges that will be on show.
Do your cuts in batches before you mix adhesive. Cutting takes far longer than fixing.
Step 8: Mix small batches and back-butter every tile
Mix only as much adhesive as you can use within its open time. With rapid adhesives that's a short window, and cuts slow you down. Spread adhesive on the wall with a 10mm notched trowel, then back-butter each tile with a thin layer so you get full contact. On textured or large tiles, this is how you avoid hollow spots.
If your installer has approved tiling any part of the fire opening, use a specialist heat-resistant fireplace adhesive there and a flexible adhesive for the rest of the chimney breast, as the DIYer in this project did.
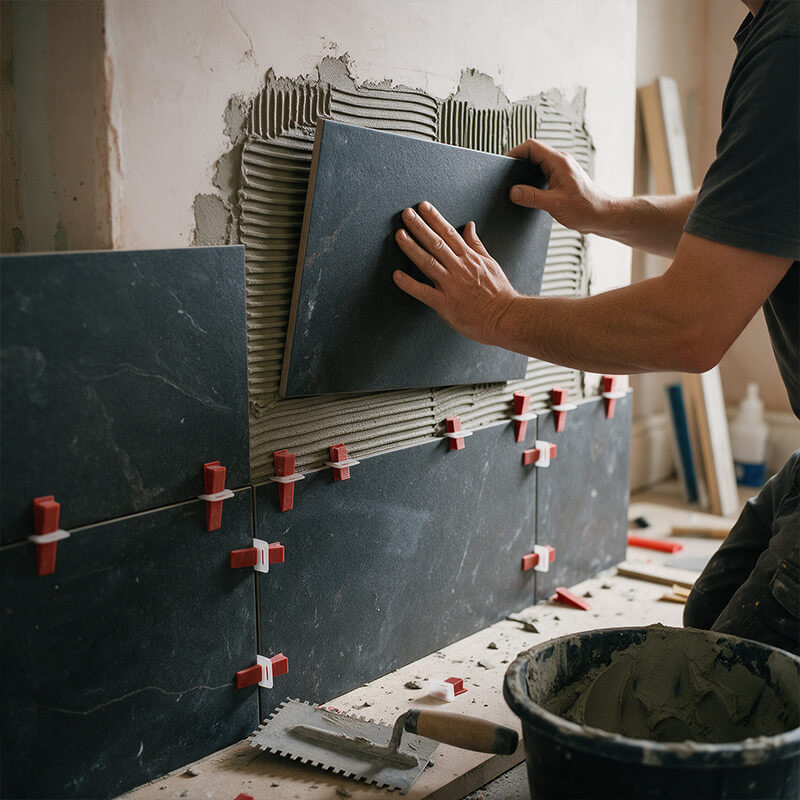
Step 9: Use levelling clips, and keep the joints clean
Tile levelling clips and wedges stop lips between neighbouring tiles, which shows up badly on large-format porcelain. Slot the clips under the tile edges, two on the short sides and around three along the long edge, then add the wedges.
Three lessons from the project:
- Fit the clips after spreading adhesive for the next tile, or your trowel will keep catching them.
- Clear adhesive away from the clips and joints as you go. Adhesive left behind the clips is slow and fiddly to rake out later.
- Don't put spacers right where four tiles meet. They can sink behind the tiles and become hard to remove before grouting. Use spacers along the edges instead.
Also watch tiles next to a batten: tightening the wedges can push a tile outward, so press it back into line.
Step 10: Plan your trims and fit them as you go
Decide which way your trims will face before you fix the first tile. On a wide chimney breast, it usually looks neater to have the trim's finished edge facing the room, with the front tiles butting against it and the side (return) tiles tucked behind its lip.
Cut trims with a hacksaw for a clean edge, mitre the corners in a mitre box, and bed the trim in adhesive so it's fully supported. If the floor isn't finished yet, leave the trims long and trim them to height later. Where a trim needs to run up into plaster, cut a shallow channel so it sits flush.
Step 11: Make L-shaped cuts around the lintel
Where a tile has to wrap around the lintel, hold it in position, mark where the lintel sits, and take off about 2mm for clearance. Mark the other side the same way, then draw the L-shape with a large square and cross out the waste.
Cut the shorter side first, then the longer side, to reduce the risk of the tile snapping. Offer it up and nibble off a little more if needed.
Step 12: Remove the clips and grout
Once the adhesive has set, knock the levelling clip tops off with a rubber mallet, striking along the line of the joint. Rake out any adhesive left in the joints.
For grouting:
- Mix small amounts (around 1kg at a time) with the water ratio on the bag.
- Never add more water once it starts to stiffen. Re-mix it instead, so you don't weaken the grout or change the colour.
- Work the grout into the joints diagonally with a grout float.
- Grout a small area for about 15 minutes, then go back and remove the excess with a clean, damp sponge, again working diagonally so you don't drag grout out of the joints.
- Leave internal corners and edges where tiles meet another surface unfilled. These get silicone.
A flexible grout copes better with the movement of a warm surround.
Step 13: Silicone the movement joints
Use a colour-matched silicone in all the internal corners, where the tiles meet the ceiling or an adjoining wall, and where the surround meets the hearth. These joints allow for small amounts of movement and stop cracks forming in the grout. A light mist of soapy water over fresh silicone makes the excess easier to tidy off.
Step 14: Clean, cure and wait before lighting the fire
Once the grout has hardened, polish off the powdery grout haze with water and a non-scratch pad. Then leave the adhesive and grout to cure fully, following both manufacturers' guidance, before your installer fits the stove or you light a fire.
Common mistakes when tiling a fireplace
- Under-ordering. 10% extra is rarely enough for a chimney breast with returns and a stacked layout.
- Tiling the wrong zone. Decorative tiles inside the firebox or directly behind a stove body, where fire-rated materials are needed.
- Skipping the dry layout. It's the difference between full, even cuts and thin slivers at the top or sides.
- Cheap cutting blades. They chip porcelain edges and waste tiles.
- Grouting the corners. Internal corners need silicone, not grout.
- Tiling the bottom row too early. If the floor isn't finished, leave the bottom row and trims until you know the final floor height.
- Lighting the fire too soon. Give the adhesive and grout time to cure fully.
Want to see the tiles before you commit? Our showrooms in Ballymount, Coolock, Deansgrange and Ashbourne are open seven days a week, so you can compare porcelain, stone effect cladding and brick slips side by side.

FAQs: Tiling a Fireplace
What are the best tiles for a fireplace?
For the chimney breast and surround, porcelain is the most practical choice. It's dense, low-porosity and easy to clean. Stone effect tile cladding, thin stone cladding, natural stone and brick slips all work too if you want more texture. For the hearth, use a porcelain floor tile.
Can you use porcelain tiles on a fireplace?
Yes. Porcelain tiles are well suited to fireplace surrounds, chimney breasts and hearths. Use a flexible adhesive suitable for porcelain, fix to a sound non-combustible background such as cement board, and leave silicone movement joints at corners and edges.
What tiles can go behind a stove?
The area directly behind a stove and inside the firebox needs specialist fire-rated materials, as specified by the stove manufacturer and your installer. Decorative tiles are for the surround and chimney breast, outside the stove's clearance zone.
What tile should I use on the hearth of a fireplace?
A porcelain floor tile in a matte or textured finish. Dark colours hide ash and scorch marks best. The tiles are a finish on a constructional hearth built to Part J of the Building Regulations; they don't replace it.
Do I need cement board to tile a fireplace?
Not always, but it helps on uneven or mixed brick and block walls. Cement board gives a flat, stable, non-combustible background. Prime it with the primer your adhesive manufacturer recommends before tiling.
Can I put brick slips on a fireplace?
Yes, brick slips work well on a chimney breast and surround. See our guide to transforming your fireplace with brick slips for more detail.
Where can I see fireplace tiles in Ireland?
You can see our porcelain, stone effect, natural stone and brick slip ranges at our showrooms in Ballymount, Coolock, Deansgrange and Ashbourne, open seven days a week. We also deliver nationwide.
Ready to start your fireplace?
A tiled fireplace done properly will look right for years. Start with the right tile for each zone, plan your layout before you mix any adhesive, order enough tiles, and leave the firebox and stove back to fire-rated materials.
Browse our porcelain tiles, stone effect tile cladding, thin stone cladding, natural stone tiles and brick slips online. Not sure which one is right for your room? Visit one of our showrooms in Ballymount, Coolock, Deansgrange or Ashbourne, open seven days a week, and we'll help you find the right tile for your fireplace.
Why Choose Tile Merchant?
Ready to start? Browse the full tile range on tilemerchant.ie.
We offer extremely competitive pricing on our entire range of tiles and likewise. We stock a huge range of wall and floor tiles, and our prices are competitive for retail and trade. Our stock is widely available in our tile stores in Ireland, which are open 7 days a week.
Alternatively, if you’d prefer to shop our tiles online, we can supply you with free samples delivered for free.

 Website