- Introduction
- Tools
- Materials
- Safety Equipment
- Guide #1: How to install artificial grass on concrete or tile
- Guide #2: How to install artificial grass on decking
- Guide #3: How to install artificial grass on gravel
- Step One: Measure the ground
- Step Two: Create an edge frame around the perimeter
- Step Three: Compact the gravel
- Step Four: Add a layer of compacted sharp sand
- Step Five: Lay the weed control membrane
- Step Six: Install a foam shockpad underlay (optional)
- Step Seven: Install artificial grass
- Step Eight: Prepare the artificial grass for use and ease-of-maintenance
- Guide #4: How to install artificial grass on soil
- Step One: Measure the ground
- Step Two: Dig up the turf and create an edge perimeter
- Step Three: Add two layers of aggregate
- Step Four: Lay the weed control membrane
- Step Five: Install a foam shockpad underlay (optional)
- Step Six: Install artificial grass
- Step Seven: Prepare the artificial grass for use and ease-of-maintenance
- Conclusion
- Why Tile Merchant?
Introduction
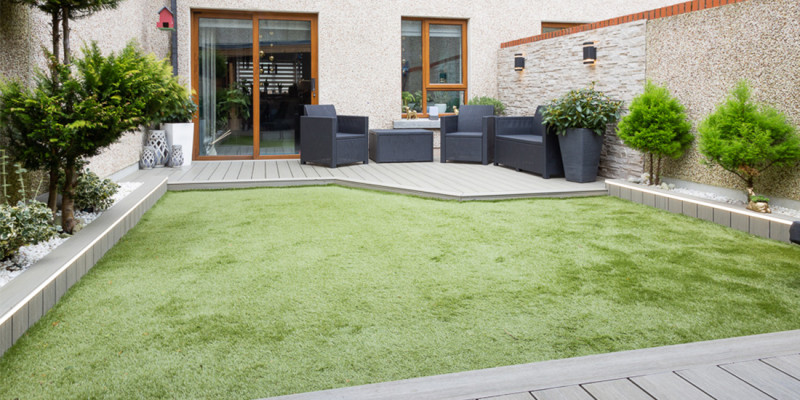
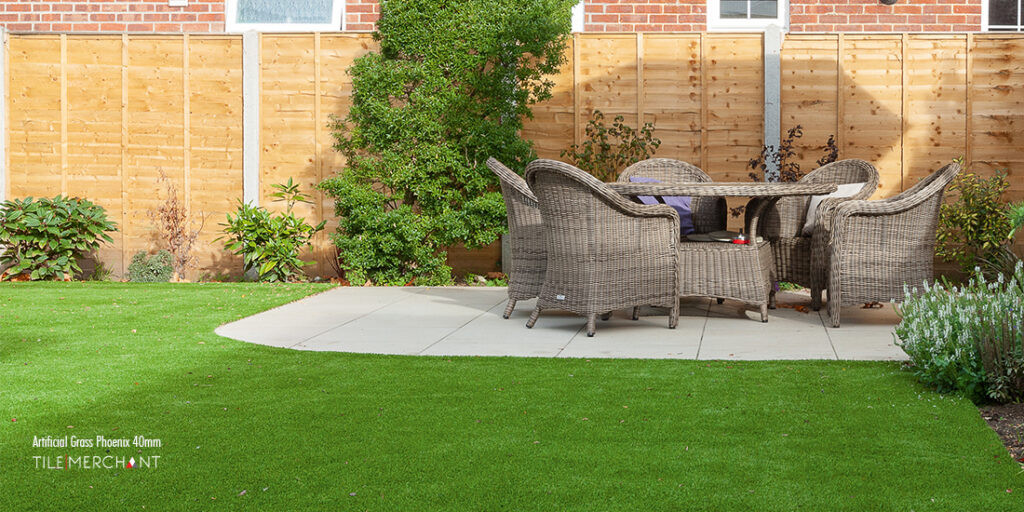
Any reservations you may once have had about artificial grass and the authenticity of its look can now be put to rest. Properly installed artificial grass, like the rolls available from Tile Merchant, can look and feel just like a real lawn, whilst requiring next to no maintenance. Installing fake grass in your back garden, on your patio, over decking, concrete, soil or even tiles, is a quick and affordable means of revitalising tired and hard-to-manage spaces.
The only questions remaining are: How do you install artificial grass? Can you install artificial grass on your own? What tools and materials do you need?
We’re glad to be able to answer the last two straight away. Though you can always turn to professional installers if need be, you can usually install artificial grass on your own (though we’d recommend doing so with another set of helping hands or two).
If you have already purchased your synthetic grass rolls, you are one step closer to finishing your new outdoor space. If you are still researching foundation requirements before buying, this guide covers the exact sub-base preparation, drainage steps, and adhesives required for every ground type.
As for what tools you’ll need, here’s what we think you should have on hand before beginning your Irish artificial grass installation this year:
Tools
- Garden spade
- Turf cutter (if laying grass on soil)
- Vibrating plate compactor (available to hire from most tool hire shops)
- Rake
- Retractable trimming knife (Stanley knife, for example)
- Cartridge gun
- Stiff broom
- Spirit level
- Garden hose
Materials
- Artificial grass
- Weed control fabric
- Artificial grass shock pad underlay
- Your choice of edging (if laying on soil or gravel - wood, brick, metal, etc.)
- MOT type 1 & sharp sand
- Galvanised nails
- Artificial grass joining tape
- Artificial grass adhesive
- Kiln dried sand
Safety Equipment
- Safety boots
- Safety goggles
- Rigger gloves
- Ear defenders
- Note: Depending on the type of installation you’re going for (concrete, tile, soil, decking, or gravel) you may not need all of the above recommended materials. We suggest you read through our installation guide for the method relevant to you, before procuring your materials.
Guide #1: How to install artificial grass on concrete or tile
If you’re looking to install artificial grass directly over a concrete or tiled area, and the concrete/tiling is still in good condition, then you’re in luck! The installation process for you is likely going to be easier, cheaper, and less time-consuming than it would be in most other situations.
Step One: Measure the ground
Before you do anything, it’s time to measure the area as accurately as possible. Using these measurements, you can order the grass, underlayer, and various other materials you need, without buying too much.
Step Two: Ensure the base layer is in suitable condition
It’s important that the first thing you do is check how suitable your concrete or tiled area is for laying down artificial grass.
If the concrete or tiles are cracked, uneven, or broken in any extensive way, then laying your fake grass on top of them is not going to work. In such situations, we’d recommend pulling up the concrete/tiles and referring instead to our guide for laying artificial grass on soil (see below).
If your concrete/tiles are in good condition, however, then we recommend checking to see that they’re even. To do so, spray all areas of the surface with water from a hose, and check to see whether the water drains, or collects anywhere in puddles.
If the water collects in puddles, then drill with a 16mm bit through the concrete/tiles at the puddled areas. Fill these holes with a 10mm shingle. Lastly, wash your concrete/tiled surface thoroughly, and leave to dry out. (If weeds are an issue with your concrete/tiles, then spray the entire area with a weedkiller at this stage.)
Step Three: Install a foam shockpad underlay
Since the concrete/tiled area will already have adequate drainage, you can immediately lay down a shockpad underlay, rather than preparing the base layer any further. We recommend a foam shockpad like this Alpha Shockpad available from our online and physical stores.
Roll out your shockpad underlay to fill the entire area of concrete or tiles, ensuring that it is snug to the edges. Use a stanley knife to carefully cut the rolls to size, and ensure they hug any obstacles tightly. Where multiple rolls meet, you can join them together either with gaffer tape or by attaching them to a strip of our Artificial Grass Joining Tape placed beneath the seams between the two rolls.
Lastly, it’s time to glue the shockpad to the concrete/tiles. To do so, apply a grass adhesive to the edges of the area in strips about 200-300mm wide, and 2-3mm thick. (Ensure you leave drainage room if your tiled/concrete area is slightly bevelled to allow for side-drainage.) You’ll have about a half hour to work with the glue, so ensure you have the shockpads back in place in time for them to adhere to the concrete/tiles.
Step Four: Install artificial grass
As you did with the shockpad underlay, now roll out your artificial grass to cover the foam underlay completely, coming snug to the perimeters of the area. You can use a stanley knife to cut the rolls to size.
Ensure that you lay multiple rolls in the same direction, and that the pile of the artificial grass faces the house (or main viewing point) so that it looks most authentic.
Where rolls overlap, you should use your stanley knife to trim the lengths of each roll (where they meet) by three stitches (as seen from the underside). Then re-lay the rolls so that there is no more than 1-2mm of a gap between their lengths, and ensure that the seam is invisible from a distance.
To join multiple rolls of artificial grass together, use the same Artificial Grass Joining Tape beneath the seams to attach the two rolls together.
Finally, repeat the process of glueing the artificial grass to the shockpad in the same manner you glued the shockpad to the concrete (see above: Step Two). Leave the grass for 2-24 hours.
Step Five: Prepare the artificial grass for use and ease-of-maintenance
The very last step in installing artificial grass on concrete or tile is to treat the fake grass with kiln dried sand. Look for “weed-free” or “weed-resistant” kiln dried sand when installing on concrete or tile, since we did not use a weed control fabric (as you would when installing on soil).
Spread the sand out at about 4-5kg per square metre. Finally, brush the grass with a stiff broom to ensure that the sand spreads out evenly and filters down to the base of the artificial grass, where it will do its work: keeping your grass cool, protected, and strong. Leave the grass to settle and then enjoy your new garden!
Technical Notes for Concrete and Tile Installations
Do you need underlay for artificial grass on concrete?
Yes. Laying artificial grass directly onto solid concrete or porcelain tiles without underlay allows the texture of the hard surface (and tile grout lines) to show through the backing over time. A 10mm foam shockpad cushions the surface and prevents moisture build-up beneath the backing.
How to stick artificial grass to concrete:
Do not coat the entire concrete floor in glue, as this prevents rainwater from draining away. Instead, apply a continuous 200mm–300mm wide perimeter band of weather-resistant polyurethane adhesive, such as GreenFX Artificial Grass Adhesive, leaving small 50mm gaps every metre to allow surface water to escape.
Laying artificial grass on concrete with sand:
Do not use a sand bed directly on top of concrete as a base level. Water running beneath the grass will wash the sand away, creating uneven hollows and blocking drainage points. Sand should only be used as a top-dressing (kiln-dried sand brushed into the grass blades) to add ballast weight.
Guide #2: How to install artificial grass on decking
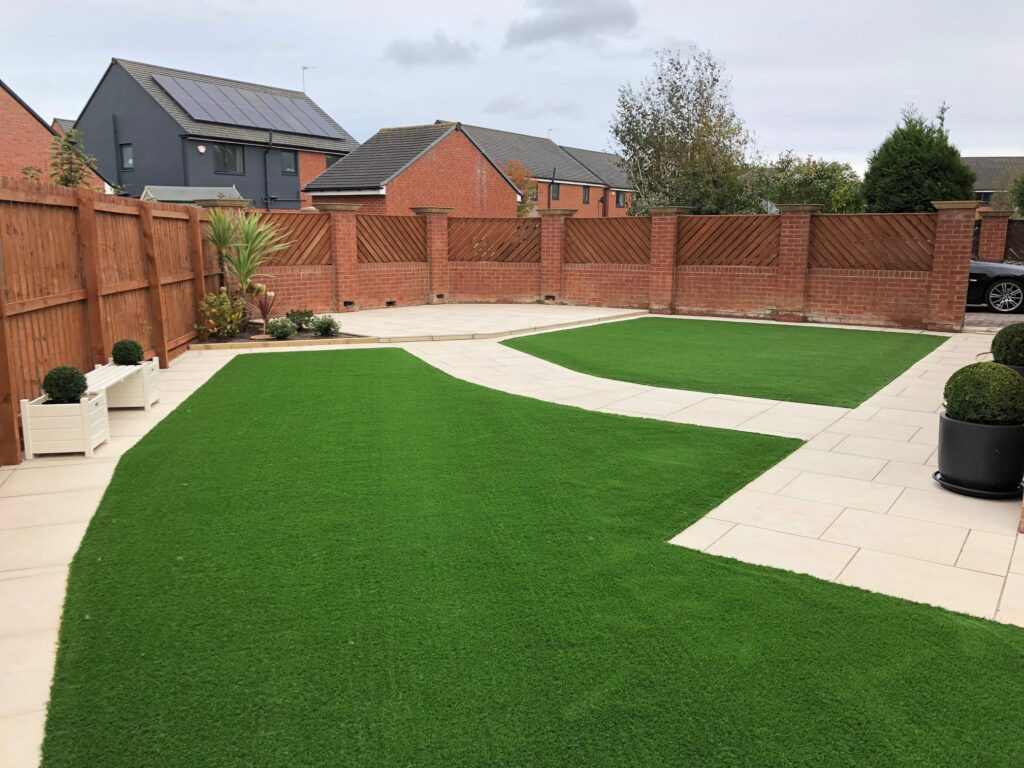
If, instead of concrete or tiles, you’d like to install artificial grass over existing decking, you’ll be glad to know that the process is equally easy, relatively inexpensive, and quick. It is also quite similar to installing fake grass over concrete and tile, but with one or two small differences, which we’ll discuss here.
Step One: Measure the ground
Before you do anything, it’s time to measure the area as accurately as possible. Using these measurements, you can order the grass, underlayer, and various other materials you need, without buying too much.
Step Two: Ensure the base layer is in suitable condition
It’s important that the first thing you do is check how suitable your decking is for laying down artificial grass.
If your decking has broken or rotten boards, these will need to be replaced before you can begin installation. We also recommend spraying weed killer if your decking experiences weed problems, and giving the whole deck a good, thorough wash and dry before installation.
Since decking already has adequate drainage, you can immediately lay down a shockpad underlay, rather than preparing the base layer any further. We recommend a foam shockpad like this Alpha Shockpad available from our online and physical stores.
Roll out your shockpad underlay to fill the entire area of decking, ensuring that it is snug to the edges. Use a stanley knife to carefully cut the rolls to size, and ensure they hug any obstacles tightly. Where multiple rolls meet, you can join them together either with gaffer tape or by attaching them to a strip of our Artificial Grass Joining Tape placed beneath the seams between the two rolls.
Step Three: Install a foam shockpad underlay
Lastly, it’s time to nail the shockpad to the decking. Use Artificial Grass Fixing Pins to nail the underlay to the decking in regular intervals, all around the perimeter.
Step Four: Install artificial grass
As you did with the shockpad underlay, now roll out your artificial grass to cover the foam underlay completely, coming snug to the perimeters of the area. You can use a stanley knife to cut the rolls to size.
Ensure that you lay multiple rolls in the same direction, and that the pile of the artificial grass faces the house (or main viewing point) so that it looks most authentic.
Where rolls overlap, you should use your stanley knife to trim the lengths of each roll (where they meet) by three stitches (as seen from the underside). Then re-lay the rolls so that there is no more than 1-2mm of a gap between their lengths, and ensure that the seam is invisible from a distance.
To join multiple rolls of artificial grass together, use the same Artificial Grass Joining Tape beneath the seams to attach the two rolls together.
Finally, glue the artificial grass to the shockpad. To do so, apply a artificial grass adhesive to the shockpad layer along the edges of the area in strips about 200-300mm wide, and 2-3mm thick. You’ll have about a half hour to work with the glue, so ensure you have the artificial grass back in place in time for them to adhere to the shockpad. Leave the grass for 2-24 hours.
Step Five: Prepare the artificial grass for use and ease-of-maintenance
The very last step in installing artificial grass on decking is to treat the fake grass with kiln-dried sand.
Spread the sand out at about 4-5kg per square metre. Finally, brush the grass with a stiff broom to ensure that the sand spreads out evenly and filters down to the base of the artificial grass, where it will do its work: keeping your grass cool, protected, and strong. Leave the grass to settle and then enjoy your new garden!
When installing over timber decking, secure the shockpad edges using stainless steel or artificial grass fixing pins rather than full-surface glue. This maintains air circulation through the deck boards and prevents the wood from rotting underneath.
Guide #3: How to install artificial grass on gravel
Whilst uncommon, it’s also possible to install artificial grass on gravel.
Step One: Measure the ground
Before you do anything, it’s time to measure the area as accurately as possible. Using these measurements, you can order the grass, underlayer, and various other materials you need, without buying too much.
Step Two: Create an edge frame around the perimeter
Artificial grass laid on gravel or soil requires a durable edge to fit it against, so you may need to install some edging at this stage. Metal, concrete, timber or brick are all suitable, just make sure the edging is level when you install it, and its height is set to be level with the grass once all base layers are laid and the grass laid on top.
Step Three: Compact the gravel
Using a vibrating plate compactor, compact the gravel all over, using a spirit level at intervals to ensure you’re keeping it level.
Step Four: Add a layer of compacted sharp sand
Next, add a 20-30mm layer of sharp sand. Rake the sand out to smooth it evenly across the underlayer of compacted gravel, then use the compactor again to make it stable. Repeat the process to give yourself a level foundation with a camber/bevelled edge around the perimeter to encourage natural drainage. Now, hose down the entire area and leave to dry (this helps weigh down the dust). Finally, spray the area with weed killer.
Step Five: Lay the weed control membrane
Roll out your weed control membrane ensuring that it is tight to the edges and covers the entire area. Make sure that multiple rolls overlap by a few centimetres so that weeds cannot penetrate any gaps. You can secure the weed membrane using U-pins affixed to the edge frame.
Step Six: Install a foam shockpad underlay (optional)
If you like, you can increase the padding of the grass with a foam underlay, which will reduce the heaviness of impacts with the grass (especially useful to households with small children). We recommend a foam shockpad like this Alpha Shockpad available from our online and physical stores.
Roll out your shockpad underlay to fill the entire area of weed membrane, ensuring that it is snug to the edges. Use a stanley knife to carefully cut the rolls to size, and ensure they hug any obstacles tightly. Where multiple rolls meet, you can join them together either with gaffer tape or by attaching them to a strip of our Artificial Grass Joining Tape placed beneath the seams between the two rolls.
Lastly, it’s time to nail the shockpad to the edge frame. Use Artificial Grass Fixing Pins to nail the underlay to the frame at regular intervals, all around the perimeter.
Step Seven: Install artificial grass
As you did with the weed membrane, now roll out your artificial grass to cover the foam underlay completely, coming snug to the perimeters of the area. You can use a stanley knife to cut the rolls to size.
Ensure that you lay multiple rolls in the same direction, and that the pile of the artificial grass faces the house (or main viewing point) so that it looks most authentic.
Where rolls overlap, you should use your stanley knife to trim the lengths of each roll (where they meet) by three stitches (as seen from the underside). Then re-lay the rolls so that there is no more than 1-2mm of a gap between their lengths, and ensure that the seam is invisible from a distance.
To join multiple rolls of artificial grass together, use Artificial Grass Joining Tape beneath the seams to attach the two rolls together.
Finally, glue the artificial grass to the shockpad/weed membrane. To do so, apply a artificial grass adhesive to the shockpad layer along the edges of the area in strips about 200-300mm wide, and 2-3mm thick. You’ll have about a half hour to work with the glue, so ensure you have the artificial grass back in place in time for them to adhere to the shockpad. You can additionally use the U-pins to also nail the grass to the edge frame. Leave the grass for 2-24 hours.
Step Eight: Prepare the artificial grass for use and ease-of-maintenance
The very last step in installing artificial grass on gravels to treat the fake grass with kiln dried sand.
Spread the sand out at about 4-5kg per square metre. Finally, brush the grass with a stiff broom to ensure that the sand spreads out evenly and filters down to the base of the artificial grass, where it will do its work: keeping your grass cool, protected, and strong. Leave the grass to settle and then enjoy your new garden!
Ensure the underlying gravel size is no larger than 10mm to 12mm crushed stone. Coarse pea shingle moves underfoot even after compaction, whereas crushed stone bound with a 20mm sharp sand topping creates a firm, self-draining base that remains level under heavy foot traffic.
Guide #4: How to install artificial grass on soil
Last but not least, here is our installation guide for installing artificial grass on an area currently covered by natural grass. This is undoubtedly the most labour-intensive method of installing artificial grass.
Step One: Measure the ground
Before you do anything, it’s time to measure the area as accurately as possible. Using these measurements, you can order the grass, underlayer, and various other materials you need, without buying too much.
Step Two: Dig up the turf and create an edge perimeter
Remove the top layer of turf (a turf-cutter will significantly reduce the effort required). Next, dig down to a 100mm depth all around the edges of the perimeter, and to a 75mm depth everywhere else. This naturally bevelled edge will help with drainage later.#
Note: If you intend to lay a foam shockpad underlay beneath the grass, dig a further 10mm at both the edges and centre to allow for this additional thickness later on.
Next, install some edging. Artificial grass laid on soil requires a durable edge to fit it against. Metal, concrete, timber or brick are all suitable, just make sure the edging is level when you install it, and its height is set to be level with the grass once all base layers are laid and the grass laid on top.
Step Three: Add two layers of aggregate
Cover the excavated area in a 75mm layer of rough aggregates, such as MOT type 1. Level it out using a rake, before compacting it with a vibrating plate compactor.
Next, add a 20-30mm layer of sharp sand. Rake the sand out to smooth it evenly across the underlayer of compacted MOT type 1, then use the compactor again to make it stable. Repeat the process to give yourself a level foundation. Now, hose down the entire area and leave to dry (this helps weigh down the dust). Finally, spray the area with weed killer.
Step Four: Lay the weed control membrane
Roll out your weed control membrane ensuring that it is tight to the edges and covers the entire area. Make sure that multiple rolls overlap by a few centimetres so that weeds cannot penetrate any gaps. You can secure the weed membrane using U-pins affixed to the edge frame.
Step Five: Install a foam shockpad underlay (optional)
If you like, you can increase the padding of the grass with a foam underlay, which will reduce the heaviness of impacts with the grass (especially useful to households with small children). We recommend a foam shockpad like this Alpha Shockpad available from our online and physical stores.
Roll out your shockpad underlay to fill the entire area of weed membrane, ensuring that it is snug to the edges. Use a stanley knife to carefully cut the rolls to size, and ensure they hug any obstacles tightly. Where multiple rolls meet, you can join them together either with gaffer tape or by attaching them to a strip of our Artificial Grass Joining Tape placed beneath the seams between the two rolls.
Lastly, it’s time to nail the shockpad to the edge frame. Use Artificial Grass Fixing Pins to nail the underlay to the frame at regular intervals, all around the perimeter.
Step Six: Install artificial grass
As you did with the weed membrane, now roll out your artificial grass to cover the foam underlay completely, coming snug to the perimeters of the area. You can use a stanley knife to cut the rolls to size.
Ensure that you lay multiple rolls in the same direction, and that the pile of the artificial grass faces the house (or main viewing point) so that it looks most authentic.
Where rolls overlap, you should use your stanley knife to trim the lengths of each roll (where they meet) by three stitches (as seen from the underside). Then re-lay the rolls so that there is no more than 1-2mm of a gap between their lengths, and ensure that the seam is invisible from a distance.
To join multiple rolls of artificial grass together, use Artificial Grass Joining Tape beneath the seams to attach the two rolls together.
Finally, glue the artificial grass to the shockpad/weed membrane. To do so, apply a artificial grass adhesive to the shockpad layer along the edges of the area in strips about 200-300mm wide, and 2-3mm thick. You’ll have about a half hour to work with the glue, so ensure you have the artificial grass back in place in time for them to adhere to the shockpad. You can additionally use the U-pins to also nail the grass to the edge frame. Leave the grass for 2-24 hours.
Step Seven: Prepare the artificial grass for use and ease-of-maintenance
The very last step in installing artificial grass on soil is to treat the fake grass with kiln dried sand.
Spread the sand out at about 4-5kg per square metre. Finally, brush the grass with a stiff broom to ensure that the sand spreads out evenly and filters down to the base of the artificial grass, where it will do its work: keeping your grass cool, protected, and strong. Leave the grass to settle and then enjoy your new garden!
Key Sub-Base Ratios for Soil Installations
Dig Depth: Excavate soil to a total depth of 75mm to 100mm (plus an extra 10mm if fitting a foam shockpad underlay).
MOT Type 1 Base: Fill with a 50mm–75mm compacted aggregate layer to provide structural support and prevent sinking.
Sharp Sand Layer: Lay a 25mm layer of sharp sand over the MOT Type 1 aggregate and compact it flat to smooth out sharp stone edges.
Fixing Edges: Anchor the grass perimeter to timber or concrete edging strips every 300mm using galvanised nails or U-shaped ground pins to prevent edge lifting over time.
Frequently Asked Questions About Installing Artificial Grass
Can you put artificial grass on concrete?
Yes. Artificial grass can be laid directly over concrete or outdoor floor tiles provided the surface is structurally sound, level, and drains water properly without forming standing puddles.
Do you need underlay for artificial grass on concrete?
Yes. Using a 10mm foam shockpad underlay is recommended when laying artificial grass on concrete. It cushions the hard surface, covers minor concrete ridge imperfections, and extends the lifespan of the grass backing.
How do you stick artificial grass to concrete?
Glue the perimeter of the shockpad or grass backing to the concrete using a polyurethane outdoor artificial grass adhesive. Apply adhesive along the outer edges in 200mm-wide strips, leaving small gaps to allow rainwater drainage.
Can you lay artificial grass on concrete with sand?
No. Do not lay a sand bed between concrete and artificial grass. Rainwater will wash loose sand away under the turf, causing uneven bumps and blocking drainage holes. Sand should only be brushed into the pile as a top infill.
How do you lay fake grass on soil?
To lay fake grass on soil, remove 75mm to 100mm of topsoil, install timber or brick edging, compact a 50mm–75mm layer of MOT Type 1 aggregate, apply a 25mm sharp sand layer, lay a weed membrane, and anchor the grass perimeter with fixing pins.
How do you install artificial grass on tiles?
Ensure tiles are clean and intact. Lay a shockpad underlay over the tiles to prevent grout lines showing through, glue the underlay edges to the tiles using outdoor grass adhesive, and lay the synthetic grass over the shockpad.
Why is kiln-dried sand needed on artificial grass?
Kiln-dried sand acts as a ballast weight (4kg–5kg per m²) to hold the grass roll flat against the ground, keep the individual green grass blades standing upright, and protect the backing from thermal expansion in summer.
Does water drain through artificial grass?
Yes. Quality artificial grass rolls have drainage holes punched into the rubber backing at regular intervals, allowing water to pass through to the crushed stone or concrete drainage base below at a rate of 30+ litres per minute per m².
Conclusion
Artificial grass can save you hundreds of hours of maintenance when compared to real grass, whilst keeping the same quality of feel, aesthetics, and durability throughout its long lifetime. Many a garden, patio and deck can be improved by laying artificial grass, and what’s better, you can usually complete the installation yourself! Just make sure that you read through the installation guide relevant to your foundation layer before starting: whether it’s concrete, gravel, soil, tile, or decking. You can buy just about everything you need to install artificial grass on the Tile Merchant website, or pop into one of our showrooms to see it for yourself.
If you have questions about choosing the right pile height, calculating roll square meterage, or picking the right joining tapes and adhesives, contact our team online or visit our showrooms for in-person advice.
Why Tile Merchant?
We offer extremely competitive pricing on our entire range of tiles and likewise. We stock a huge range of wall and floor tiles and our prices are competitive for retail and trade. Our stock is widely available in our tile stores in Ireland, which are open 7 days a week.
Alternatively, if you’d prefer to shop our tiles online, we can supply you with samples delivered for free.

Article written by Calum
Cal Bannerman is a freelance writer, editor, podcaster and voice actor from the Scottish Borders. He runs the storytelling podcast "Stories from the Hearth" and lives in a wee Glasgow Flat with his partner and their cat".